Eyeliner Try On Online: Test the Wing Before You Draw It
Eyeliner is the highest-risk step in a makeup routine. A wing that sits two millimetres too high changes the shape of the eye, and by the time you see it you have already committed the product. An eyeliner try on online lets you see the finished line on your own eyes first — where the wing should end, how thick the base should be, whether a sharp flick or a soft smudge suits your eye shape. You upload a front-facing photo, pick a liner style, and the tool draws it onto your own eyes while your features, skin tone and background stay exactly as they are.
Before and After Example
Drag the slider to compare the original photo with the AI try-on result.
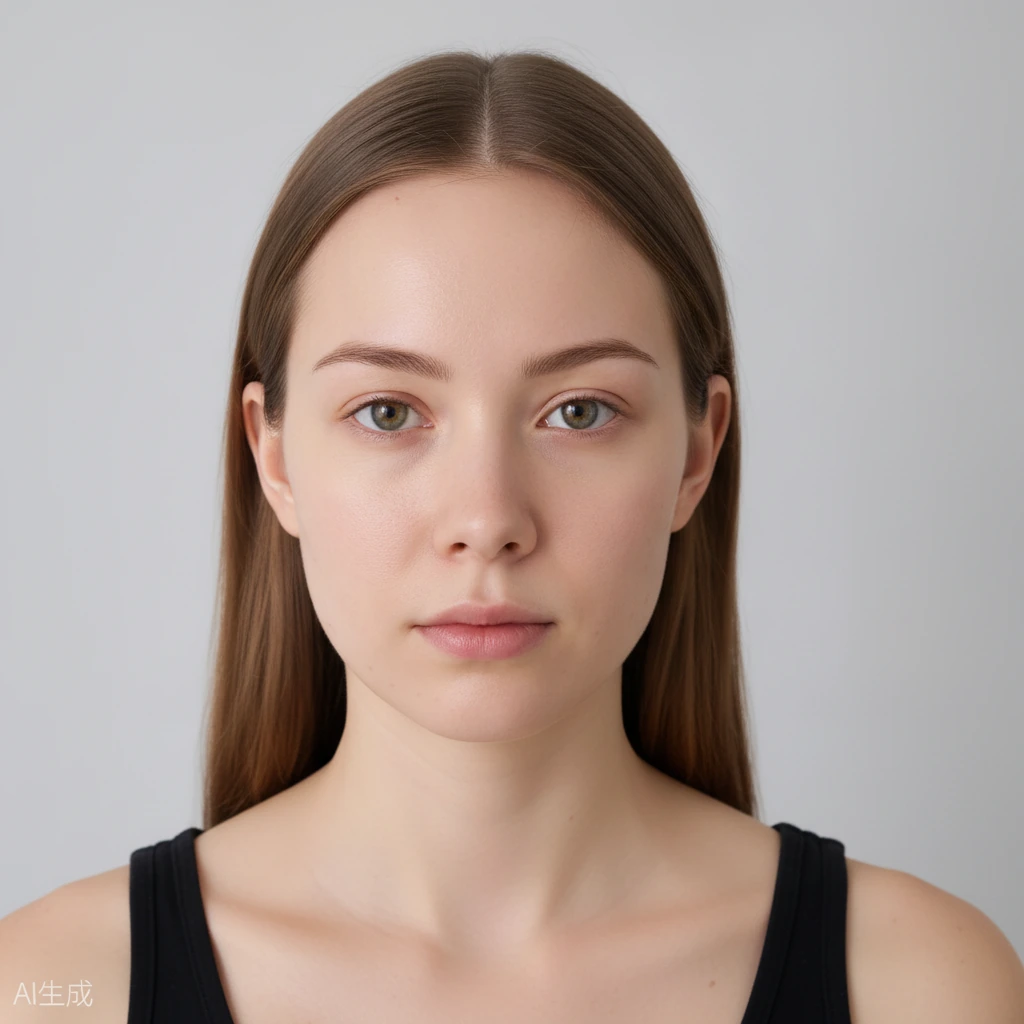
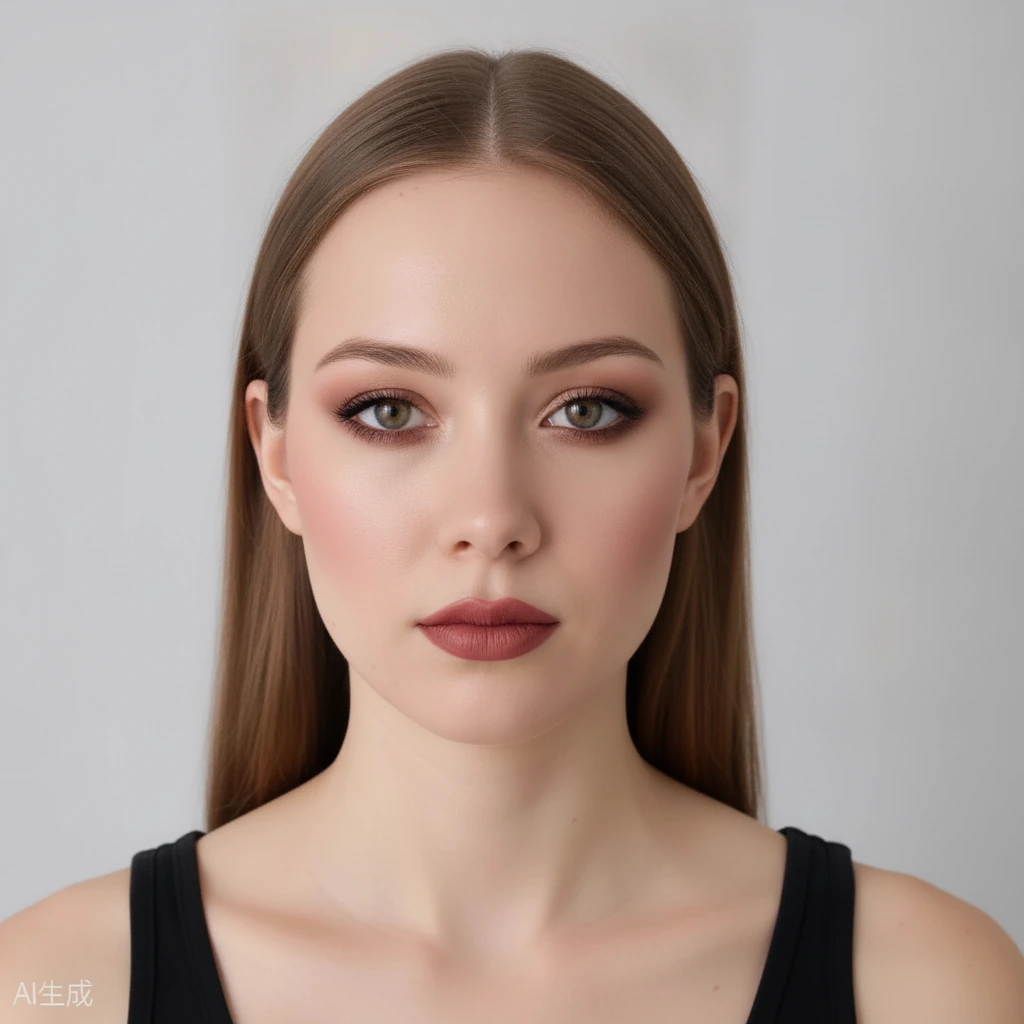 BeforeAfter
Why Eyeliner Is the Hardest Thing to Guess
Every other makeup step is forgiving. Blush can be blended down, eyeshadow can be softened, a lip colour can be blotted. A liquid liner is a single irreversible stroke on the most visible part of the face, and the margin between a clean wing and a heavy one is a couple of millimetres.
The problem is that the correct line is not universal. It depends on your eye shape, the space between your crease and your brow, how hooded your lid is and how much of the outer corner is visible when your eye is open. A tutorial made for almond eyes produces a visibly different result on hooded or monolid eyes, even when the technique is followed exactly.
That is what makes a preview useful. You are not copying a shape from someone else's face — you are seeing where the line should stop on yours, which is the piece of information a tutorial cannot give you.
It is also the step where a bad purchase hurts most. A liner that smudges, flakes or drags is unusable no matter how good the colour is, and knowing the shape you want before you shop narrows the field considerably.
The Four Liner Styles and Who They Suit
A classic wing extends from the outer corner and lifts slightly upward. It adds length and works on most eye shapes, but the angle matters: too steep and it reads theatrical, too flat and it drags the eye down. On hooded eyes the wing usually needs to start slightly lower and extend further out, because the crease covers the inner part of the line when the eye is open.
A tightline sits on the upper waterline rather than above the lashes. It makes the lash line look denser without adding visible width, which suits people who want definition but find a full line too heavy. It is the least risky option for a first attempt and the easiest to preview.
A smudged or soft liner is drawn slightly wider and blended immediately. It reads softer than a sharp line and suits rounder eye shapes, where a crisp wing can look severe. It is also more forgiving of an unsteady hand.
A graphic or floating liner sits above the crease rather than on the lash line. It is a deliberate statement look and the one where a preview saves the most trouble, because the placement is unforgiving and depends entirely on the proportions of your own lid.
Getting a Useful Preview
Take the photo straight on with both eyes open and looking directly at the camera. A downward or upward angle compresses the lid and makes the wing look like it sits in a different place than it will in real life.
Use even daylight and avoid a hard light from above. Shadows in the crease will be filled in by the tool and you will end up judging the liner on a distorted lid shape.
Start with a clean eye. Existing liner or heavy shadow makes it hard to see the new line clearly, and the point of the exercise is to judge a single element accurately.
Compare at least two styles rather than one. The useful information is the difference between a wing and a tightline on your eyes, not the absolute look of either — that comparison is what tells you which direction to go.
Using the Preview When You Actually Apply It
Keep the image open while you apply. Most people lose the shape between the preview and the mirror, and having the reference beside you stops the wing from creeping upward with each correction.
Match the endpoint first. Draw the flick to the position the preview showed, then connect back to the lash line, rather than drawing along the lid and hoping the end lands in the right place. Working backwards from the endpoint is the technique that survives an unsteady hand.
Check with the eye open, not closed. The preview shows the finished look with your eye open, and that is the state that matters — a wing that looks balanced closed can disappear or sit too high once the lid folds.
Keep the reference for next time. Once you know the angle and length that suit your eye, the decision is settled and you can stop experimenting on the morning of an event.
Frequently Asked Questions
Is the eyeliner try on free?
Yes. Free daily credits are included and no account is needed to start, so you can test several liner styles at no cost.
Will it work on hooded or monolid eyes?
Yes. The liner is drawn onto your own eyes, so you see how the wing sits with your actual lid shape when the eye is open, which is the case where tutorials copied from other eye shapes usually fail.
Can I choose between a wing, a tightline and a smudged line?
Yes. Different liner styles are available, and you can compare them on the same photo to see which direction suits your eye shape.
Does it show how the liner behaves during the day?
No. The preview shows placement and shape, not wear time, smudging or flaking. Those depend on the formula you buy, so patch test on your hand before committing to a full day.
Is my photo stored?
Uploaded photos and results stay private, are never published or indexed, and are deleted automatically after a limited period.